


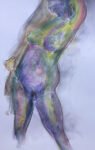
And here's another naked female figure. This is Rhus, another model from artmodeltips.com. I took…
Rhus’ Back
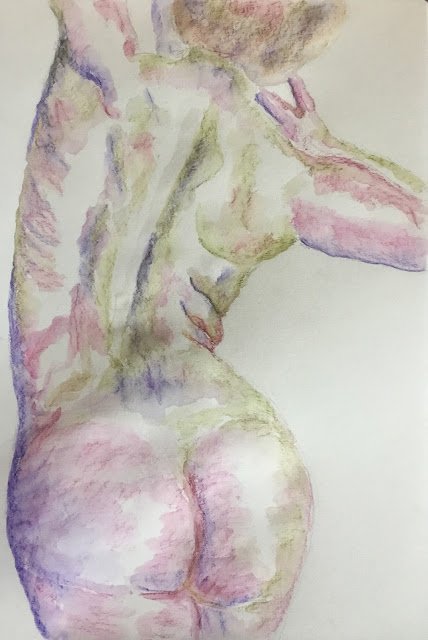
After all that fun with the markers, I thought I really should get back to doing some proper painting with the inktense pencils. Today I’m back to one of my very first models, Rhus. I picked this pose out because it was quite simple, with not many lines and contours to draw. I thought this meant I might be able to reproduce something like Michael, Kneeling with its large white areas and limited use of colour.
But I couldn’t resist adding more and more colour to some of the areas I should have kept empty, as you can see from the dry version of the painting:

Anyway, the colours. I started with willow in the darkest places, then moved in to violet, leaf green and Shiraz. The colours were partly motivated by all the green and red I could see in the shin tones. In fact, the cheeks in the source photo looked so red, I felt I had to introduce fuchsia into the mix. I actually tried to mix the colours in the pencilling stage today, which is quite unusual for me. And the hair has all of the colours in it, just to help keep everything together – realistic hair and impressionistic skintones just wouldn’t have worked.
When I opened up the pencil case I found a note inside it saying “Sculpt! Don’t colour in!” It was a touch of genius when I wrote myself that note. It’s very easy to think at the end of the pencilling that the job’s all done and that all I need to do is wet all the pencil marks but it’s not that simple. I need to keep thinking during the wetting stage. It’s important to use the direction of my wetting marks to sculpt the 3D shapes in the painting. And I did that today. That’s one well rounded pair of cheeks at the bottom.
Was this painting a success though? I think so, yes, just about. This one’s going in the shop window. To see the price, click here.
Leave a Reply